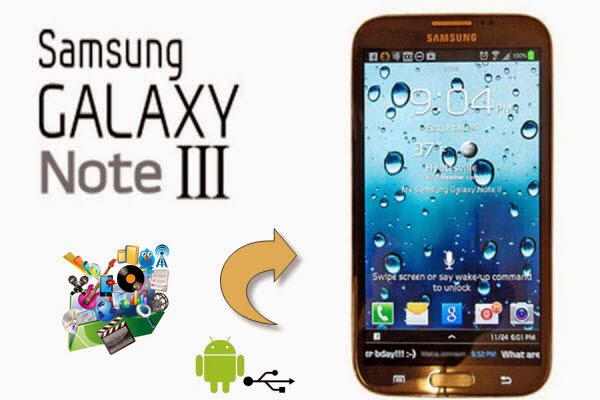
Summary: You can transfer files to and from your PC to Samsung Galaxy Note 3 through different methods. This article will discuss the files that can be transferred and the ways of moving them between devices.
The
Galaxy Note 3 is more than a phone, it's a great video/movie/music player that lets you listen to your favorite music and watch the funny videos while exercising or traveling to work.
But, having said that, you need to know how to transfer music and video files to Galaxy Note 3 phone before you can start enjoying on the go.
In this article, you'll see how simple it is to transfer your favorite music and video to your Galaxy Note 3.
Multiple ways to transfer music and video files to Galaxy Note 3?
There are various ways you can transfer video and audio files to your Galaxy Note 3. Here are the 7 methods :
Download from Internet.
Transfer from PC.
Transfer from a PC with Samsung Kies.
Transfer from a PC with Windows Media Player.
Receive via Bluetooth.
Receive via Wi-Fi.
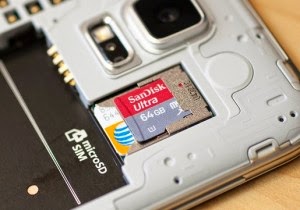
Copy to your memory card.
And, out of these 7 methods, I've picked the 2 most common ones and explained in more details below.
i. Transfer music and video files from PC.
1. Connect your Galaxy Note 3 to your PC using the USB data cable.
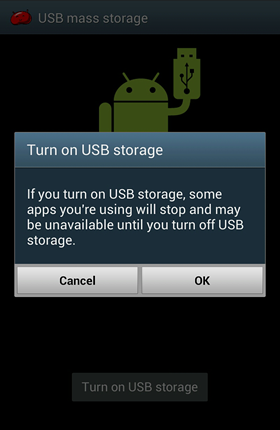
2. Once connected, you should see a
USB icon appears in the Notifications bar. Drag the
Notifications bardownwards, and then tap on the
Connected as a media device.

3. On the
USB PC connection screen, ensure the
Media device (MTP) checkbox is ticked. And now, you're ready to transfer files between your PC and phone.

4. Open up your PC Windows Explorer, and you should see your Galaxy Note 3 shows up as a removable disk.
5. Access the phone storage via Windows Explorer. Here, you should see quite a number of folders such as
Playlists, Ringtones, Pictures, Music and etc.

6. Next, drag-and-drop/copy-and-paste your music or video files from your computer to the
Music or
Videos folder. The stock music and video players on your Galaxy Note 3 will search and list them on the apps automatically.
Note:You can create the Videos folder using the Windows Explorer, if it isn't in your phone.
7. Alternatively, you can create a new folder in either your phone storage or external memory card to store these files. Again, the music and video players on your Galaxy Note 3 will search and list them on the apps automatically.
ii. Transfer music and video files using Samsung Kies 3.
1. Install Samsung Kies 3, and then launch the software on your PC.
2. Connect your Galaxy Note 3 to your PC using the USB data cable.
3. Taking music as an example, click the
Music option below the
Connected devices.
4. Next, click the
+ sign. If your phone has an external SD card, then you should see the
Internal and
External memory options. For this tutorial, I will select
Internal Memory.

5. Next, through the
Windows Open dialog, select the music files that you would like to copy to your phone.
 Note: Now, you can click the Videos option (instead of Music) in Step 3 and then follow the rest of the steps to add video files to your phone.
Note: The steps here were written for Android 4.3 on a Samsung Galaxy Note 3 (SM-N9005). If you're having a different model of Galaxy Note 3 or other version of Android, there's a possibility that the steps and screenshots will be different.
Learn more Quick Start Guide, Tips and Tricks for Samsung Galaxy Note 3:
Alright, you whipped out your credit card, and now you've got your Samsung Galaxy Note 3. Ready to learn more about this phone and what it can do for you ? Is Samsung Galaxy Note 3 Your Best Device to Watch HD Videos an Movies?
Yes, and no. Although it has large and high-res screen, it cannot break the boundary of playing Android compatible videos like MP4/H.264 only. Don't worry, you've come to the right place.
Since Galaxy Note 3 does not support an external Blu-ray or DVD drive, besides, most commercial Blu-ray/DVDs are encrypted by film studio which makes it much more difficult to play Blu-ray/DVD on Galaxy Note 3 everywhere.
To play Blu-ray & DVD movies and SD/HD Videos(HD MKV, AVI, Tivo, VOB, MPG, WMV, FLV, F4V, MTS, M2TS, etc.) on your new Samsung Galaxy Note 3 phone, you need to prepare a high-end HD video/movie conversion software, such as
Pavtube Video Converter Ultimate. It is a Top Video Converter especially for Android (such as Galaxy Note 3) users. The main role is to convert any SD/HD videos and Blu-ray/DVD Movie to be Galaxy Note 3 compatible in both video format, file extension, resolution and so on.
Here are the articles that will help you to get Blu-ray/DVD movies onto your new shiny phone:
Guide:
How to play Blu-ray/DVD movies and HD Videos on Galaxy Note 3
Related Software
Pavtube Video Converter Ultimate: As top All-in-one Converter software, it helps you convert Blu-ray, DVD and SD/HD video files to proper video formats for playback on Android, Apple, Windows 8 tablets & phones and HD Media players, etc., editing on Avid Media Composer, Adobe Premiere, Sony Vegas, Pinnalce Studio, CyberLink, Windows Movie Maker, etc., sharing to YouTube, Vimeo, Google + and FaceBook, etc. Support adding *.srt and *.ass subtitle. With the best Ultimate Converter, you can have all kinds of files converted into any video format you need!
Money-saving Trip:
ByteCopy($42) + Video Converter Ultimate($65) = Only $79.9, Save $27.1 ByteCopy($42) + DVD Creater($35) = Only $44.9, Save $32.1
Video Converter Ultimate($65) + Vidpie($29) = Only $74.9, Save $19.1 Video Converter Ultimate($65) + DVD Creater($35) = Only $64.9, Save $35.1 BDMagic($49) + Vidpie($29) = Only $49.9, Save $28.1 BDMagic($49) + DVD Creator($35) = Only $49.9, Save $28.1 DVDAid($35) + Vidpie($29) = Only $49.9, Save $14.1 DVDAid($35) + DVD Creator($35) = Only $35.9, Save $34.1
Pavtube Free DVDAID: Free convert and backup any DVD disc, users can rip and convert both common DVD and commercial DVD with copyright protection. Apart from free convert DVD to AVI/MKV at fastest speed and excellent quality, also capable of free converting DVD to MPEG, MOV, WMV, FLV, F4V, SWF, etc. Makes perfect 1:1 copy with 5-15 minutes. What's more, you can merge multiple videos into one file, cutting off the ads of DVD, adding subtitles to source videos, adjust video and audio parameters, etc.
Pavtube BDMagic: One of the best BD/DVD disc handling tools on the market, integrates disc backing up and ripping skills to make it standout, runs perfectly on Windows 8.1, Windows 8, Windows 7, Windows XP, Windows 2003, Windows Vista. The best Blu-ray Ripper is capable of 1:1 copying BD/DVD Disc content to local computer or external hard drive in original file structure with all subtitle tracks and audio streams preserved; directly Copy only BD/DVD main movie and leave out extras. It can rip 2D/3D Blu-rays and standard DVDs to 3D MKV/MP4/MOV/WMV/AVI(Side-by-Side, Top-Bottom, or Anaglyph). Support adding *.srt and *.ass subtitles into video and batch conversion. You can rip latest released BD/DVD Disc to all Android, Apple and Windows tablets & smartphones.
Pavtube ByteCopy: ByteCopy is meant to provide users with the possibility to rip and convert Blu-ray and DVD to MKV container format with multiple audio tracks and subtitle sincluded. Besides retaining multi tracks in an MKV video without transcoding and quality loss, ByteCopy is also able to encode the original soundtracks into 5.1 channels with your wanted language. It preserves chapter markers in the converted MKV file. All that and more make it possible for you to easily select your needed tracks, subtitles, as well as chapters when watching Blu-ray and DVD movies with your media players. And other than that, you can backup and convert latest Blu-ray and DVD movies to any other formats like
MP4/MOV with multi-track audios, M4V, AVI, WMV, MPG, M2TS, etc for playback on iOS/Android/Windows Tablets/Phones, HD Media Players (WDTV), editing software (Avid Media Composer, Adobe Premiere, Sony Vegas, Windows Movie Maker, etc.), and more.
Related Article
Play HD Videos on Galaxy Note 3: Convert MKV, AVI, VOB, Tivo, MPG, WMV, M4V, MOV, FLV, F4V, VOR, EVO, 3GP, MTS. M2TS, M2T, MXF, etc. videos to Galaxy Note 3 support fotmats for playing.
Play Blu-ray movies on Galaxy Note 3: Rip Blu-ray to Galaxy Note 3 support playback format for playing.
Play DVD movies on Galaxy Note 3: Convert the latest DVD disc to MP4 for viewing on Galaxy Note 3.
About Samsung Galaxy Note 3
The Note 3 sports a 5.7-inch, full high-definition screen, a slight boost from the Note 2's 5.5-inch display. But despite the bigger screen, the Note 3 is thinner and lighter, measuring 8.3mm and weighing just 168g.
The screen is as bright, colourful, and responsive as we've come to expect. You can do everything with your fingertip, as on most tablets, but the S Pen stylus gives you even finer control.
Under that slablike screen is a beefy 2.3GHz processor with a whopping 3GB of RAM. All that power harnessed to a giant screen could empty the tank with alarming alacrity, but a 3,200mAh battery is there to ensure there's plenty of grunt left when you need it. And the Note has plenty of speed, too: it has 4G LTE for connecting to the Internet at high speeds, with support for the fastest category 4 4G.
Supported Video Formats For Samsung Galaxy Note 3
Samsung Galaxy Note 3 supported video format:
- Codec: MPEG4, H.263, H.264, VC-1, DivX, WMV7, WMV8, WMV9, VP8
- Format: 3GP(MP4), WMV(ASF), AVI, FLV, MKV, WebM
Samsung Galaxy Note 3 supported audio format:
Codec: MP3, OGG, WMA, AAC, ACC+, eAAC+, AMR(NB,WB), MIDI, WAV, AC-3, Flac
From:
http://mediaconverting.blogspot.com/2013/10/transfer-music-video-file-to-galaxy-note-3.html


 "
"


 checkbox")


")


