What is Video_TS folder?
When you insert a video DVD into your computer, you can open the DVD and view the contents just like a folder on your hard drive. Most video DVDs have two folders in the root directory - AUDIO_TS and VIDEO_TS. The VIDEO_TS folder contains all the DVD's video data and playback information. There are three kinds of files inside a Video_TS folder: VIDEO_TS.IFO, VIDEO_TS.BUP, and VIDEO_TS.VOB.
Import Video_TS folder to FCP X?
Obviously, Video_TS folder doesn#8217;t natively work with FCP X, you must convert the Video_TS folder to FCP X supported editing file formats. As a matter of fact, what you need is simply a Mac Video_TS Converter. The program we highly recommend to you here is called Pavtube ByteCopy for Mac, it has perfect compatibility with the all Mac OS including macOS High Sierra, macOS Sierra, Mac OS X El Capitan, Mac OS X Yosemite, Mac OS X Mavericks, etc.
Related article: Import Phantom 4 4K to FCP X | Import NX1 H.265 to FCP X | Can FCP Support DJI Osmo 4K Video
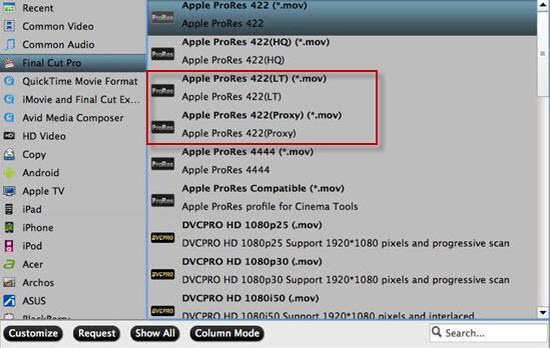
Apart from the Video_TS folder, the program also provides loading support for DVD disc, IFO/ISO image file and also Blu-ray disc/BDMV folder/ISO image file. With this powerful yet simple to use application, you can not only transcode Video_TS to FCP X editable digital file formats such as MP4, MOV (QuickTime), DV, HDV, etc file formats, but also directly output FCP X most favorable high quality and high performance editing codec - Apple Prores in different file types including Apple Prores 422, Apple Prores 422 HQ, Apple Prores 422 Proxy, Apple Prores 422 LT, etc for different editing needs on either powerful or underpowered Mac computer.


Step by Step to Import and Edit Video_TS Folder with FCP X
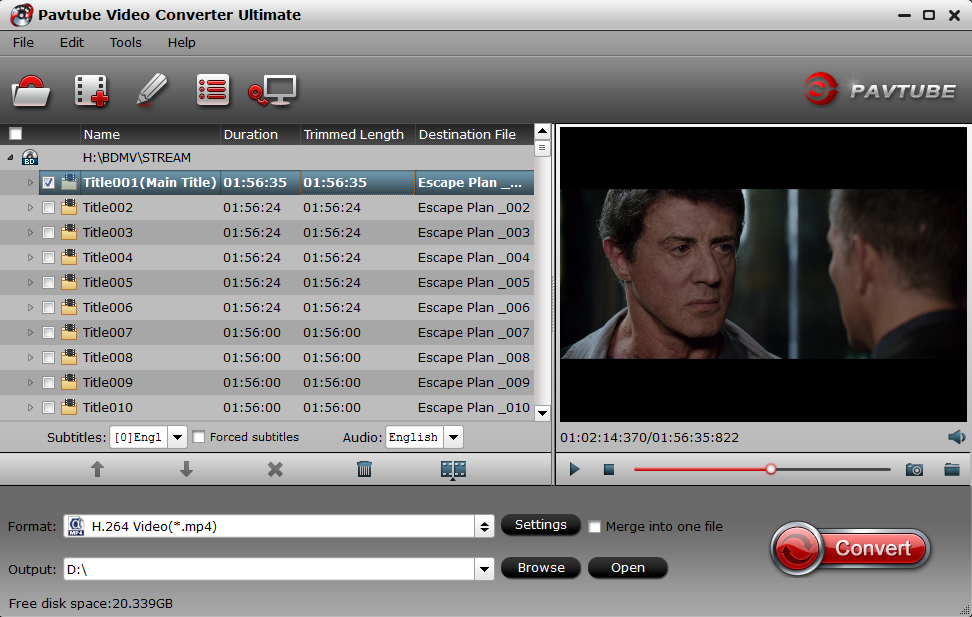
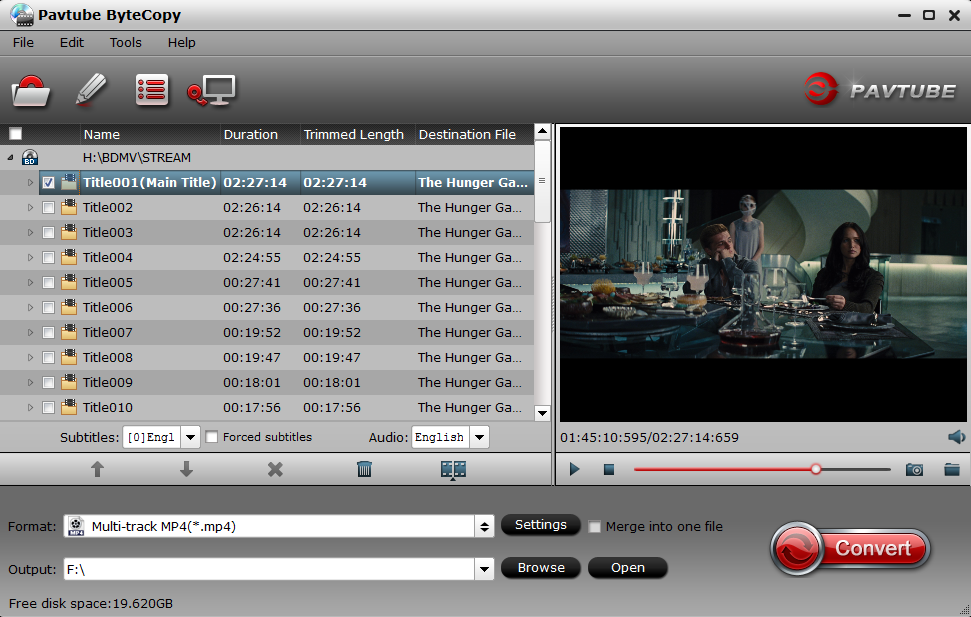
Step 1: Load Video_TS folder.
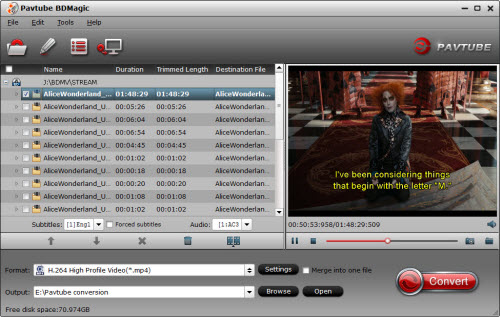
Download, install and run this Video_TS Converter on your Mac computer. For loading DVD Video_TS Folder, just click "File" > "Load from folder", you can also load DVD disc by clicking "File" > "Load from disc" or load DVD IFO/ISO image by clicking "File" > "Load IFO/ISO".
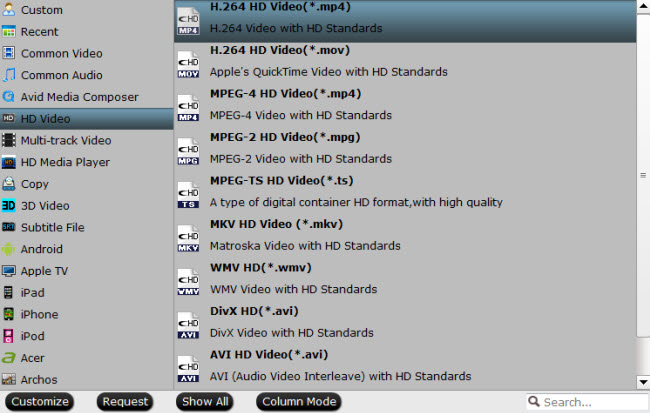
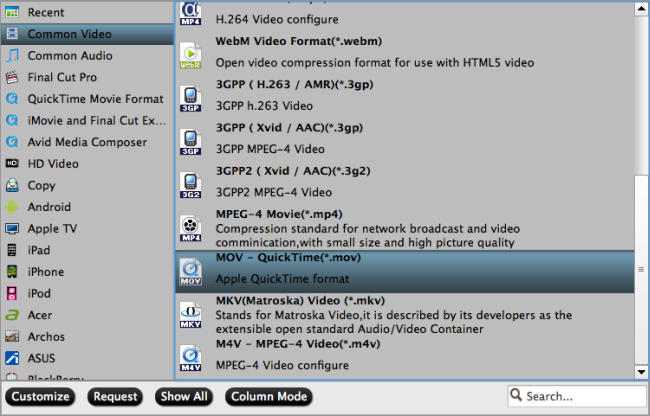
Step 2: Define the output format.
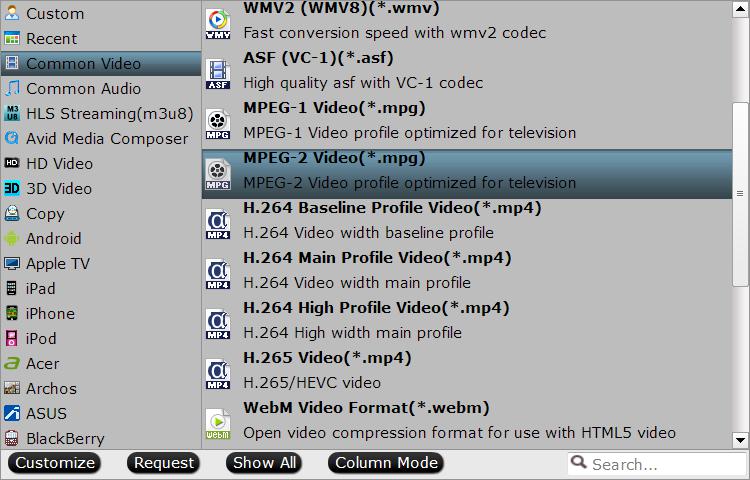
Clicking the Format bar, from its drop-down list, you can choose one of FCP X best compatible editing formats such as "MOV - QuickTime(*.mov)" under "Common Video" main category.
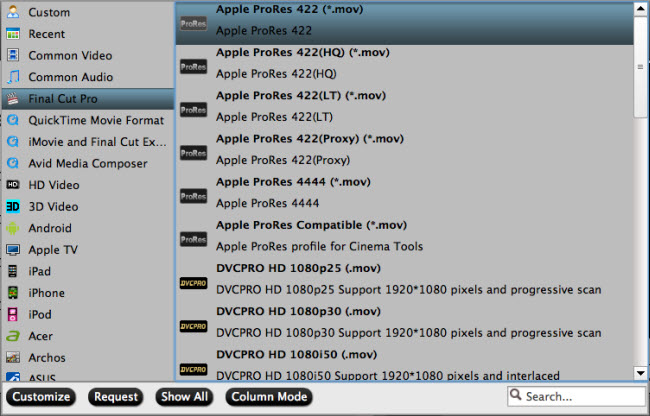
If you wish to achieve a high quality and high performance editing workflow of Video_TS with FCP X, just output FCP X most preferable "Apple Prores 422(*.mov)" under "Final Cut Pro" main category to get the optimal editing experience.
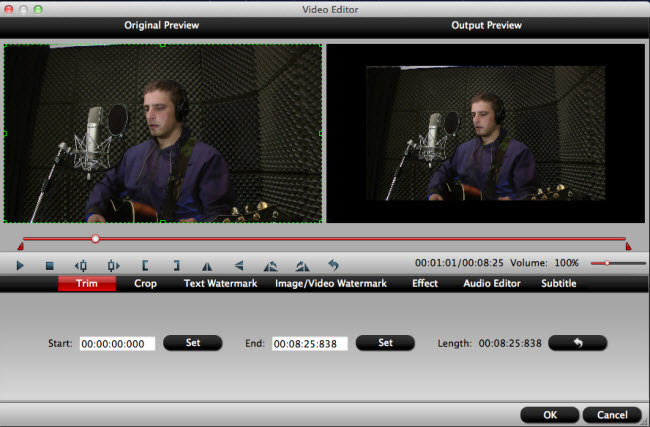
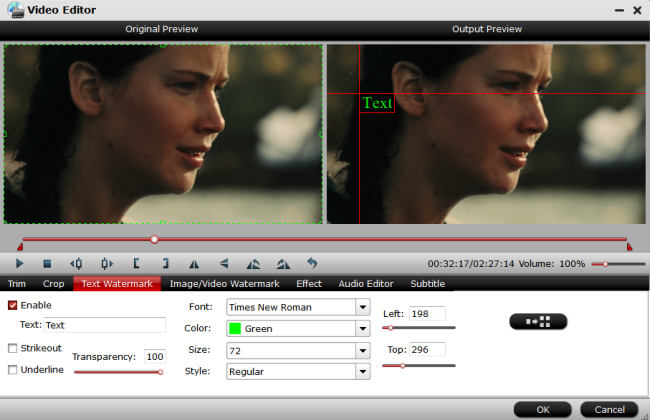
Step 3: Edit Video_TS files with built-in editing options.
By default the Edit icon is grayed out. To activate the Edit menu, you have to select an item first. When a movie title or chapter is selected is selected, click the pencil like Edit icon on the left top tool bar to open the video editor window, here, you can play and preview the original video and output effects. Also you can flip or rotate video, trim, crop, add watermark, apply special effect, edit audio or insert external subtitle.
Step 4: Begin the final conversion process.
After all setting is completed, hit the "Convert" button at the right bottom of the main interface to begin Video_TS to FCP X supported editing formats or most preferable Apple Prores editing codec transcoding process.
When the conversion is finished, click "Open Output Folder" icon on the main interface to open the folder with generated files. Then just feel feel to import converted video to FCP X for professional post editing workflow.
Related Articles
Any Product-related questions?support@pavtube.com